Essex, United Kingdom - craftwithsarah@gmail.com - 07545879858

Saturday 30 July 2016

Penned & Painted


Good morning to you, hope you are well!

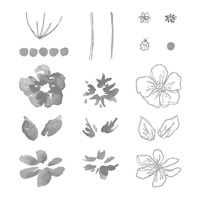
Well today's post is all about the Penned & Painted Photopolymer Stamp Set. It is brilliant as it gives a nice artistic look to a card without having to be umm, artistic!
 

So I did a few cards here, the style of the stamp is a bit like last week's one with the baby bear, it is a 3 step stamp.

For the big flower you stamp with the middle row flower stamp on the left with your lightest ink, then you stamp with the next stamp along (which is kind of in the middle of the image above) with your darker colour ink. The final stamp is the one on the right in the middle row which is an outline stamp. I have been using the black archival ink for the outline stamp but you can use any colour you want. There is an arrow on the stamps which makes it easier on knowing where to place your stamps each time as it will be pointing in the same direction each time you stamp.

The same process goes for the leaves and bottom flower stamps.


The thing is with these stamps you do not have to do the 3 step process, you could just do the outline and then colour in with a waterbrush or markers. Or you could do the first 2 steps and just leave the outline, there are numerous possibilities which makes this stamp set so versatile and neverending!

With my yellow flowers I used Crushed Curry and So Saffron, for the blue ones I used Soft Sky and Marina Mist and for the pink flowers I used Blushing Bride and Melon Mambo.

I did most of these cards by doing the masking technique, this is where I stamped the outline of the flowers onto a post-it note and cut it out. I then stamped a flower doing all 3 steps onto the card and then covered it up with my cut out flower post-it note to then stamp a flower next to it and overlapping my previous one. However, because a post-it note was on the one I overlapped it did not affect my first flower and I did this so on and so on with all the other flowers.
Do you get it? if not just let me know and I will try and do a little video to try and explain it! It will be my first video but I have just ordered a little cheap tripod to hold my phone so that I can start doing tutorials, so look out for them here on my blog :-)


Table built using Product Table Builder by The Crafty Owl


So that is that from me for now! Hope to hear from you all, and thank you for reading my blog, until next time...

Sarah x


Saturday 23 July 2016

Baby Bear


Hello all!

It is me again! Wow the week has gone by quickly and it's the weekend already, woop!

So my post this week is all about the Baby Bear photopolymer stamp set.


This is a lovely stamp set which is perfect for a new addition to the family, or for a child's birthday card, but obviously can be used for anything you want, they are just a few of my suggestions.

So this is the stamp set and you use it in 3 steps:
  1. Choose three ink colours, usually in the same colour spectrum, such as dark brown, medium brown and light brown, etc.
  2. Use the bottom left bear stamp and stamp in the lightest ink colour.
  3. Use the bottom right bear stamp and stamp over top of the first image with the medium ink colour.
  4. Finally use the top right bear stamp and stamp over the first two images with the darkest ink colour.

It does not matter if you do not get it exactly in the right place, as I have done some a bit off but it does not really show, and the more times you do it the better you get at it!


 These cards were stamped with Chocolate Chip (darkest), Soft Suede and Crumb Cake (lightest).

I used Blushing Bride and Pool Party stitched statin ribbon, card for matting and enamel shapes.

Both on Crumb Cake note card bases.


  The blue bear was stamped onto Soft Sky card stock, and the following inks were used, from dark to light, Night of Navy, Marina Mist and Whisper White.

The grey bear was stamped onto Blushing Bride card stock, and the following inks were used, from dark to light, Basic Grey, Smoky Slate and Whisper White. 

The ribbon is stitched satin in Crumb Cake.
 
 
I thought it would be good to do a card in yellow, in case you wanted a gender neutral card.

I might do another card with a yellow bear, using Crushed Curry, So Saffron and Whisper White, but there are so many combinations to do all you can do is just try them out, that is half of the fun!!


 This final card stamped, again, onto Blushing Bride card but this time using inks (dark to light) Melon Mambo, Flirty Flamingo and Whisper White.


Well that is it from me for now, I will be back next week with more creative makes, look forward to seeing you.

Table built using Product Table Builder by The Crafty Owl

Thank you for taking the time to read my blog

Sarah x

Saturday 16 July 2016

Jar of Love


Good morning all!

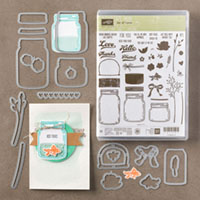
How are you all? have you been doing much crafting recently, and have you been using the Jar of Love bundle? If so, then I would love to see some lovely piccies of them!

So here are the cards that I have been making with my Jar of Love bundle. I originally was not going to buy this set as was not that keen on them but after seeing some lovely makes with them from other SU demostrators I just had to get them!


I have only made three cards so far with this set but it does take time stamping and then die cutting the flowers, but it is totally worth it once you finish the card!

For the first I stamped onto a window sheet with black StazOn ink and cut it out with the jar die. I then used blue vellum behind the window sheet to look like water. 
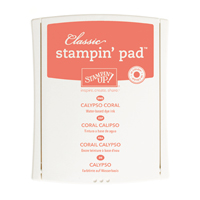
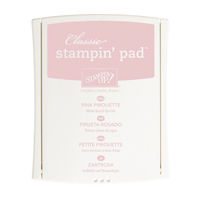
I stamped the flowers with Wisteria Wonder, So Saffron, Pink Pirouette, and Calypso Coral. I stamped the large part of the flower by stamping off, so its a paler colour and the second colour I stamped straight onto the flower, so it is a darker look and looks like two different inks were used for one flower but it is only one. 

The branches in the background were done with white craft ink before sticking the flowers on and then the jar over top.

The stalks were stamped with Wild Wasabi ink.


This card was made similar to the above but the jar was just done on white card and some stalks stamped onto it.

The floating flowers around the jar was done using the white craft ink and some rhinestones.

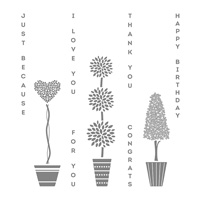
The sentiment was used from the Vertical Greetings stamp set.

This card and the above card base were made with the Crumb Cake card, cut in half longways at 10.5cm and then folded in half to make two card bases.


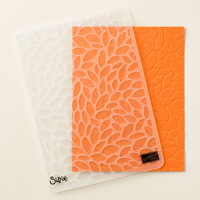
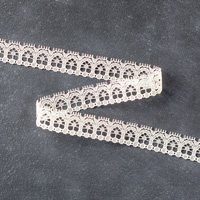
This final card was done in the same as the above cards but the background of the card was put through the 'Petal Burst' embossing folder to give it that nice textured backing and a bit of lace was wrapped around the edge of the card which I think gives it a vintage feel!


Below are the items you can purchase to make the above cards, just click on the image and it will take you to the place to buy it and all you have to click is add! To use the embossing folder and thinlit dies you will also need a big shot machine, which is a very handy machine and is worthwhile purchasing if you have not got it already!

Table built using Product Table Builder by The Crafty Owl

Thank you for taking the time to read my post and will hopefully catch up with you next Saturday.

If you have any questions then please do not hesitate to ask, no question is silly! And please leave comments, as I love reading them.

Bye for now

Sarah x


Saturday 9 July 2016

Thoughtful Branches - Exclusive, Limited time bundle!!!!


Good afternoon all!

Hot news...

There is an exclusive, Limited-time bundle that Stampin' Up! are coming out with for you to purchase from 2nd August to 31st August or whilst stocks last!
It is for one month only so get yours as soon as you can.

It is the Thoughtful Branches photopolymer stamps set and thinlit dies for just £46.75!

Or the Photopolymer stamps alone are £24 and the thinlit dies by themselves are £28. SO if you buy the bundle you are saving yourself 10%! You know its worth it!


Contact me to find out more on how to purchase this beautiful exclusive set!


Wednesday 6 July 2016

New promotion! Bonus Days!


Stampin’ Up! has a fun new promotion this month! 

If you add enough to your order to reach £45.00, Stampin’ Up! will email you a £4.50 coupon to use in August! 

You can put that coupon towards your next order during the month of August. 

That means today would be a fantastic time to splurge on items from your wish list, because you will get a coupon for every £45.00 you spend! 

To shop and earn these vouchers just click above on the Shop Online tab now!!!


Saturday 2 July 2016

Jem's Blog Hop - Animals!


 Back to the beginning of the Blog Hop!


Good morning crafters!

So I see you have just joined me from Julie Wade's blog, I hope you enjoyed their animal cards, I am sure you have. Well now you are with me Sarah Lindsay and incase you didn't get the theme it is Animals!

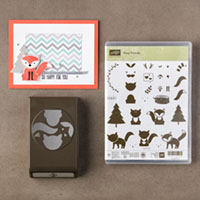
So for my post I decided to use the Foxy Friends Photopolymer Bundle, this includes the stamp set and the punch that coordinates with it.


I love this stamp set as I don't just have to make a fox, I can make a raccoon, a squirrell, a lion, a tiger oh my! and many more animals that I may not have thought of yet. Also I don't have to get my big shot out if I cannot be bothered to as I can do it all sitting at my table with some card, stamps and a punch.


The lion was done with Daffodil Delight cardstock and ink and the mane was made using one of the May Flowers Framelit dies, however it can be cut out freehand. The lion's tail was cut out freehand from the tail punch bit.


The tiger was made using Pumpkin Pie ink and the stripes were drawn on using a black pen. The squirrell from the top picture was done by drawing in two front teeth and colouring them in with a white gel pen.


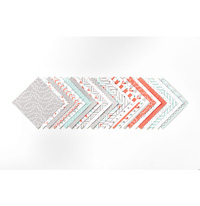
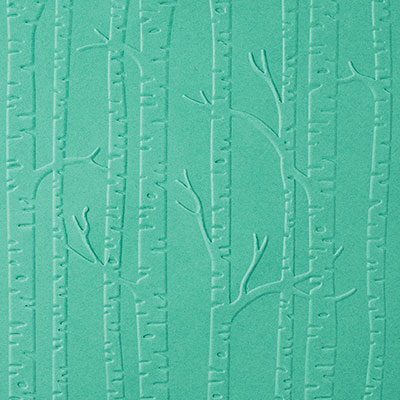
I paired the stamps with the coordinating paper set, A Little Foxy DSP, and it just works really well with it. I also used the Woodlands embossing folder and just having the image and a sentiment keeps it quite simple yet effective!


One of the lion cards uses a different paper stack which is called Serene Scenery and this has loads of different images of real scenes, see if you can work out which one it is! I love that paper pack also (along with everything else) as there is so much I can and want to do with it, just need to get more time!

So that is that from me for now, please follow the links below to check out the next post in our blog hop and some more brilliant creations. Hope you check back with me soon and thank you for reading my blog.

Thanks

Sarah x


http://createhandmadehappiness.blogspot.co.uk/2016/07/july-jems-blog-hop.htmlhttp://kraftingk.blogspot.com/2016/07/jems-blog-hop-theme-animals.html


Some of the products used to make the above cards:


Facebook

Limited edition Paper Pumpkin kit

My Pinterest

Follow