Essex, United Kingdom - craftwithsarah@gmail.com - 07545879858
Showing posts with label Penned & Painted. Show all posts

Saturday, 3 December 2016

December Jems Blog Hop


http://samscakesandcrafts.blogspot.com/2016/12/my-stampin-up-favourites-2016.html

Good morning guys!

You may have just joined me from Gill's blog and if not you can always click on the above and it will take you to the beginning to start from there.

So the theme of this month's hop is 'A review of 2016' well I took this as what was my favourite product to use from this year, and my fave item was the 'Penned & Painted' stamp set. 
  
 I love using the Penned & Painted stamp set, it gives a beautiful watercolour image without having to:
  1. Be able to draw, and
  2. Be able to paint 
This stamp set makes me look like an artist and it produces gorgeous images which really make the product I create stand out, or maybe that is just me and you may think otherwise, but still I like this stamp set.


The above calendars were made with the Penned & Painted stamp set and the sentiment was stamped from the Scenic Sayings clear mount set. 

One of the lovely things about Stampin' Up! is that all the products colour co-ordinate with each other which allows all the individual items to just combine seamlessly and therefore make a lovely piece of work.


The calendars were bought off of amazon.co.uk, I could have handmade the calendars with the Project Life date it stamp set like in my previous post regarding my onstage display items but I wanted to make quite a few to sell at my stall so this would have taken a long time, so made a short cut!

Also here are a few products I have made previously and shown on previous blog posts regarding this gorgeous stamp set:


 So I have included a product list below for the main items to purchase from my online store, any questions you may have about how to make any of the things above then just ask and I will be happy to help.

Thank you for reading and hopefully you will be back soon!

Sarah xx


 Click on the right image to either go onto the next blog post or click on the image on the left to go back, you decide!

http://makemoorcards.blogspot.com/2016/11/a-review-of-2016.htmlhttp://www.stampinup.net/esuite/home/ragbagbadger/blog?directBlogUrl=/blog/5017923/entry/placeholder

Saturday, 30 July 2016

Penned & Painted


Good morning to you, hope you are well!

Well today's post is all about the Penned & Painted Photopolymer Stamp Set. It is brilliant as it gives a nice artistic look to a card without having to be umm, artistic!
 

So I did a few cards here, the style of the stamp is a bit like last week's one with the baby bear, it is a 3 step stamp.

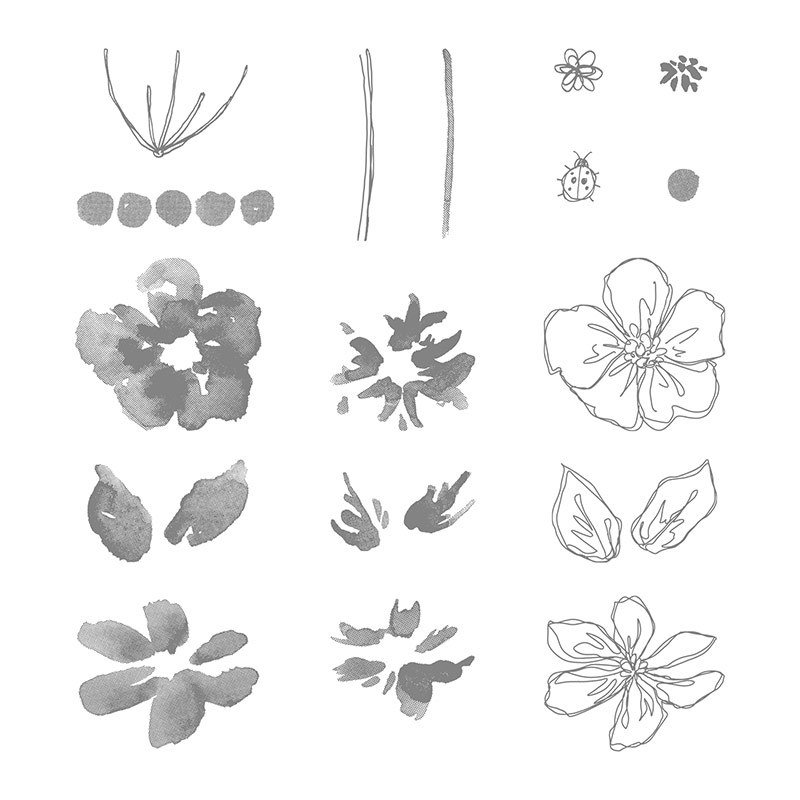
For the big flower you stamp with the middle row flower stamp on the left with your lightest ink, then you stamp with the next stamp along (which is kind of in the middle of the image above) with your darker colour ink. The final stamp is the one on the right in the middle row which is an outline stamp. I have been using the black archival ink for the outline stamp but you can use any colour you want. There is an arrow on the stamps which makes it easier on knowing where to place your stamps each time as it will be pointing in the same direction each time you stamp.

The same process goes for the leaves and bottom flower stamps.


The thing is with these stamps you do not have to do the 3 step process, you could just do the outline and then colour in with a waterbrush or markers. Or you could do the first 2 steps and just leave the outline, there are numerous possibilities which makes this stamp set so versatile and neverending!

With my yellow flowers I used Crushed Curry and So Saffron, for the blue ones I used Soft Sky and Marina Mist and for the pink flowers I used Blushing Bride and Melon Mambo.

I did most of these cards by doing the masking technique, this is where I stamped the outline of the flowers onto a post-it note and cut it out. I then stamped a flower doing all 3 steps onto the card and then covered it up with my cut out flower post-it note to then stamp a flower next to it and overlapping my previous one. However, because a post-it note was on the one I overlapped it did not affect my first flower and I did this so on and so on with all the other flowers.
Do you get it? if not just let me know and I will try and do a little video to try and explain it! It will be my first video but I have just ordered a little cheap tripod to hold my phone so that I can start doing tutorials, so look out for them here on my blog :-)


Table built using Product Table Builder by The Crafty Owl


So that is that from me for now! Hope to hear from you all, and thank you for reading my blog, until next time...

Sarah x


Facebook

Limited edition Paper Pumpkin kit

My Pinterest

Follow